
 ???? 1")

-30%


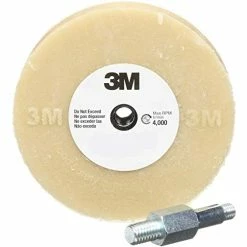


Cheap ???? 3M Stripe Off Wheel Adhesive Remover Eraser Wheel Removes Decals, Stripes, Vinyl, Tapes And Graphics 4” Diameter X 5/8” Thick 3/8-16 Threaded Mandrel 07498 Pack Of 1 ????
Original price was: $42.99.$30.09Current price is: $30.09.
- Fast, friendly, always here to help.
- Quality that lasts, prices that don't.
- Buy with Confidence, Get Quality
- Shop with Ease

- Item Diameter: 4 Inches
- Brand: Cubitron
- Item Dimensions LxWxH: 5.5 x 4 x 1 inches
- Grit Type: Medium
- Item Thickness: 0.63 Inches
- WON’T DAMAGE THE SUBSTRATE – Engineered to safely remove unwanted decals and stripes without altering the material underneath
- VERSATILE – Also works well for removing vinyl, tape and graphics
- COMPATIBLE WITH MOST DRILLS AND ROTARY TOOLS – Can be used at a maximum of 4,000 rpm
- USE FOR SMALL AREAS – 4” diameter and 5/8” thickness is ideally suited for small, hard-to-remove detailing
- DURABLE FOR LONG LIFE – Solid molded wheel is designed for durability to provide a long service life
- WORKS FAST – Designed for high-speed removal to help save you time
- EASY TOOL ATTACHMENT – Includes 3/8-16 threaded mandrel for easy attachment to your tool
| Style | Mandrel, No Mandrel |
|---|
6 reviews for Cheap ???? 3M Stripe Off Wheel Adhesive Remover Eraser Wheel Removes Decals, Stripes, Vinyl, Tapes And Graphics 4” Diameter X 5/8” Thick 3/8-16 Threaded Mandrel 07498 Pack Of 1 ????
Add a review
Related products
-30%
Original price was: $11.09.$7.76Current price is: $7.76.
-30%
Original price was: $9.99.$6.99Current price is: $6.99.
-30%

Original price was: $7.69.$5.38Current price is: $5.38.
-30%
Original price was: $66.98.$46.89Current price is: $46.89.
-30%
Original price was: $14.95.$10.47Current price is: $10.47.
-30%
Original price was: $30.95.$21.67Current price is: $21.67.
-30%

Original price was: $6.99.$4.89Current price is: $4.89.
-30%
Original price was: $6.96.$4.87Current price is: $4.87.
Peter O. Reusch –
This product is amazing!Makes Adhesive Removal a breeze WITHOUT DAMAGE TO SURFACE AUTOMOTIVE PAINT.In this case, Window Rain Guards were first removed exposing the original dual sided Foam Adhesive. (That was the no fun painstaking part!)With a little trial and error you will find the right technique. Tips that make the job easier as follows:MATERIALS1) 4″ 3M Eraser Wheel2) Variable Speed Drill w/ Chuck Clutch3) Plastic Razor Blade Scrapper (Photo)4) Goo-Gone Spray5) Soft Towel & Shop TowelTECHNIQUEA) Secure the Eraser Wheel to Drill. Set Clutch at half way mark and adjust as needed depending on Type of Adhesive to surface resistance encountered.B) FIND and START AT THE FURTHEST RIGHT SIDE OF ADHESIVE TO BE REMOVED.With the Drill operating in Forward Clockwise direction turning at SLOW SPEED, Start by Approaching the PLANE of the SURFACE with PLANE of the wheels narrow width exterior surface; In other words… PARALLEL.For best results keep these two surfaces as parallel as possible. This will maximize the effectiveness of the removal while wearing the earser wheel’s surface evenly.C) Finding the amount of pressure needed is done by adjusting the speed of the Drill. DO NOT OVER SPEED; THAT may overheat the surface or Drill. When in doubt, step away for a bit to cool and resume.The trick is to find the best balance of Drill Speed, Pressure of Wheel against Surface, and Rate of moving against product to be removed.ADJUST THE CHUCK CLUTCH FOR THE APPROPRIATE RESISTENCE ENCOUNTERED.D) Move from the exterior edge that is to be removed and allow the complete peeling off of product before moving on.POGRESS IS BEST BY SLOW STEADY & CONSISTENT BALANCING PRESSURE, SPEED AND RATE OF MOVEMENT.After completing first pass. Go over area again to catch remaining residue.E) Using a Shop Cloth, gently brush off surface of all chucks of adhesive/rubber Eraser.F) DETAILINGThe older the material to be removed the more likely this next step will be needed. This was done on a 15 year old truck removing Factory Original Window Rain Guards.To remove anything left behind, lightly mist GOO-GONE over area.Immediatly follow by using ONLY a Plastic Razor (photo) on the Goo-Gone sprayed area. Approach the wet Surface at a very low angle so not damage paint.Wipe off using Soft Cotton Towel (Old White T Shirt works well)WASH. WAX AS DESIRED TO RESTORE PAINT PROTECTION.G) STAND BACK AND ADMIRE YOUR HANDYWORK.GREAT JOB – LOOKS AWESOME!
shelovespickups –
We’re restoring a boat we recently purchased. Neither of us cared for the name or that it was plastered along the sides as well as the transom. I was at a loss on how to remove such old decals and was directed to this wheel by a boating group I’m a member of. I was a little leery because it says not to use on fiberglass. If you aren’t careful it will get too hot and burn it. I bought it anyway figuring I might be able to be careful and wow! I was able to remove the name on the side in minutes. The back took longer because the graphic is larger and required more care but still, less than an hour with very little wear on the wheel.
Ivan Infante –
I’ve written different reviews based on several methods to remove adhesive from a vehicle recently. I did the fishing line, goo gone, and the 3m strip off wheel. Well, this one worked the best and just got everything done quickly and without issue. I was concerned since the adhesive I had to remove was from some chrome overlays the previous owner added on the exterior pillars of my LS460. The original pillars are piano black which is somewhat sensitive to scratches. At this point I figured I’d use this tool and if they scratched… I would just replace them and be done with it. Well, I’ve remove 3 overlays so far and used the wheel to remove the adhesive and while I do see some surface scratches… it’s not really noticeable and likely there from previous car washes etc. However, it really made the job very easy and I don’t have any complaints. It was worth the money and I’m sure I can just polish out the surface scratches and call it a day. I will need to wash the car afterwards because this just leaves debris everywhere. No big deal.
WS –
I removed some fender flares from my truck and there was quite a bit of tape adhesive left behind.I tried heat, I tried WD40, I tried Goo Gone, and finally I tried this 3M Wheel. I know there are cheaper versions of this but I didn’t want to have to find out that another product failed and then have to end up buying the real deal anyway.So I bought this one and in no time all traces of the fender adhesive was gone, no damage to my vehicle, and I still have 80 or 90 percent of this product left in case I ever need it again.Big thumbs up!
Th0s3p30pl3 –
Worked great!! Easy to use!
robert a phelps –
Used as directed with low speed cordless drill. Stripped both sides pin stripes on an 05 Tucson in about 12 minutes. No sticky residue, did not have to keep cleaning the wheel. It’s great when something actually works without an issue.